Preview Your New Application Form
EnrolHQ provides the ability to preview your form without having to fill out a "dummy" application.
- Settings > Form Fields

When you select the Preview the current form will open in a separate tab. Any time you make a change in the Form Fields this form needs to be refreshed.
As you can see if you are also using an 'Expression of Interest Form' this can be viewed in the same location.
When you are reviewing the Application and want to change a field (either it is missing or is not required) you can select the Form Field that relates to the question and 'turn off/on' a question and/or change the setting from Mandatory to non-Mandatory.

Some Form Fields are 'Permanent' and you cannot 'turn off/on' a question or make it Mandatory. You can however add a description, e.g. As per the birth certificate

- When you select the relevant field on the left hand side, the Form details are displayed on the right hand side of the screen ready for editing
- This shows that the Form Field is enabled
- This shows the current settings
- This shows which form the Form Field is enabled for - there are five choices
- This shows which Form Fields are Mandatory
- You can add a description for any of the Form Fields
- Multiple Choice Field - you can switch this on form some Form Fields to allow parents to pick more than one response
- No changes will take place unless you press save
Once you have saved your changes you can refresh your preview, which is displayed on a separate tab.
Set Up the Form Header Page Step
These details are setup via Custom Forms stubs
- Go to Custom Forms > Select the relevant Green stub form e.g. Enrolment and Scholarship (or EOI)
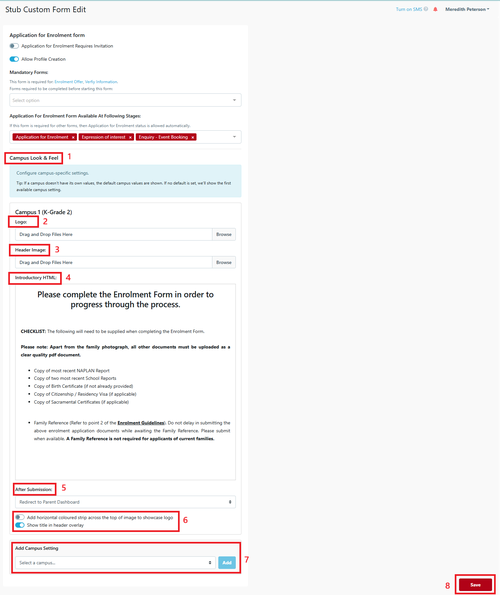
- Campus Look and Feel - this is always the default campus - if a school is multi campus they will need to add additional Campuses in step 7 below.
- Logo - this is always the image that have been added in the default campus. If it needs to be different you can upload a different logo here for just this form.
- Header Image - this is always the image that have been added in the default campus. If it needs to be different you can upload a different logo here for just this form.
- Introductory HTML - this information is displayed at the top of the form prior to the parent commencing by entering their email address. Users can use HTML code or select WYSIWYG to use the standard formatting options.
- After Submission - there are multiple options for actions after the form has been completed and submitted:
- Show Confirmation
- Re-direct to Parent Dashboard
- Re-direct to Enrolment Offer acceptance
- Re-direct to next custom form
- Re-direct to URL
- Add horizontal coloured strip across the top of image to showcase logo and/or Show title in header overlay - these create different ways to display the form that you may select according to your preferences.
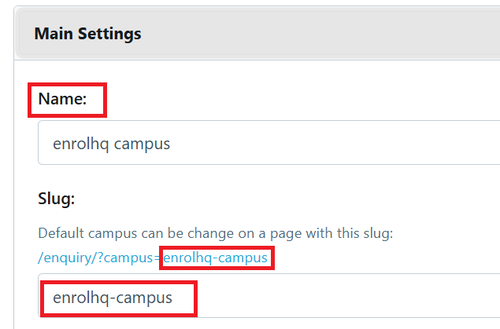
- Add Campus Setting - EnrolHQ allows schools with multiple campuses to use the same form with different options as shown in steps 1-6 above. To look at how a form previews by campus:
https://testing.enrolhq.com.au/student/enrolment/?campus=enrolhq-campus
The link is found in Settings> Campuses > Main Settings
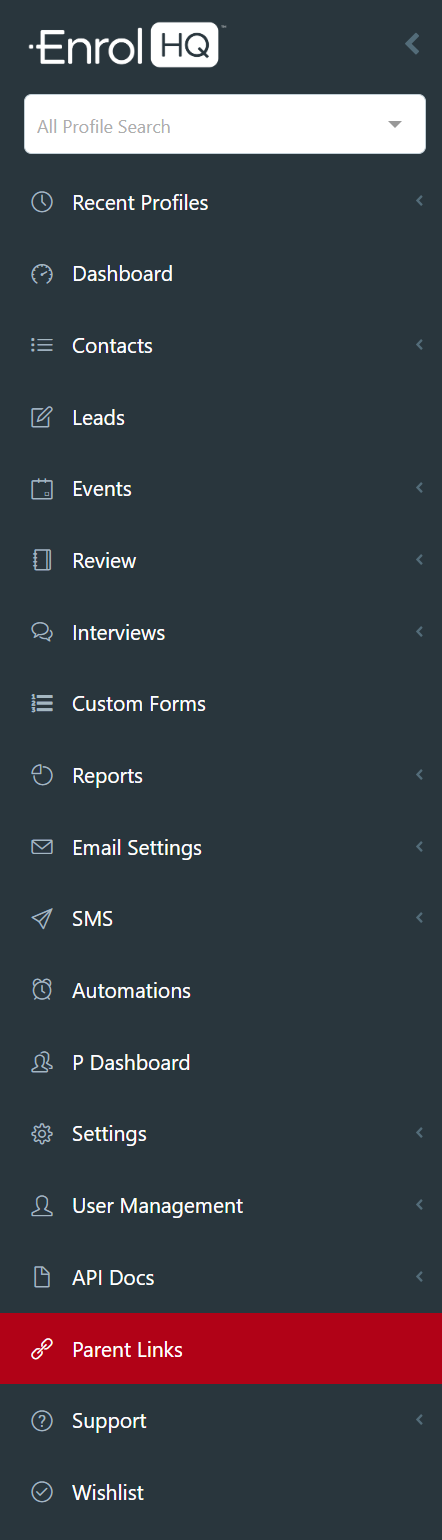
You can preview the page by using the Parent Links on the main menu.
Set Up the Application Form Signature Step
These details are set up in Customisation
- Settings > Customisation > Enrolment Signature Step

Next Steps
The setup can be viewed using the Preview button.
Edit, Add Item or Remove any of these fields Steps by using the standard buttons.

I/We agree that if my/our child is enrolled at School he/she should:
These are questions the parents answers on their child's behalf.
Edit, Add Items or Remove any of these conditions by using the standard buttons.
If my/our child is enrolled at School, I/we agree to:
These questions are directed at the parent.
Edit, Add Items or Remove any of these conditions by using the standard buttons.

Enrolment Form Agreement Checkboxes Items:
Here parents agree to specific conditions upon signing the application.
Edit, Add Items or Remove any of these conditions by using the standard buttons.
Enrolment Form Agreement Checkbox Add-On Text:
Some schools will add all their terms and conditions here.
You must remember to save for the changes to take effect.
Adding Policy Agreement Documents
These details are set up in Customisation
- Settings > Customisation > Policy Agreement Documents
It is recommended that these are reviewed annually.
All documents loaded here should have dates and version numbers included in the document.
Each document can be added to all stages of application.
