
EnrolHQ comes with powerful bulk email sending tools and automated email/notifications built-in. By using the CRM filters to look for families in a particular year group and entering in a calendar year, you can send targeted and personalised messages in bulk to move parents along the ‘carriages’ of your EnrolHQ train from the ‘Discovery’ carriage to the ‘Enrolment Carriage’. This is why collecting a parents email, the childs’ calendar year of entry and year level of entry is at the core of everything EnrolHQ does, so you are able to filter your CRM and invite these families to enrol when they are in Year 5 for a Year 7 intake.
The automated email system will let you program EnrolHQ to send emails to staff or to parents when certain conditions or ‘triggers’ are met. For example if an Offer of Enrolment expires, you can send a notification to a staff member to follow up with those parents personally.
In the main navigation menu, you will find an ‘Email Settings’ button which will let you go to Templates, Signatures and Automated Emails.

There is a large library of built-in email templates, you will see that at each stage of enrolment i.e Enquiry, Booking, EOI, Enrolment there are built in templates that get sent to staff and to parents. You will also see ticks and crosses for the ‘Is Automatic’ column - these will show you which emails are sent automatically (due to a parent completing a task/submitting a form) and which ones are not automatic, that is they need to be initiated by the staff. Non-Automatic emails include making offers, declining students, inviting to enrol - these are all sent if and only if a staff member makes that action.
Emails that are sent to the Staff have ‘Staff’ at the end of the name - that means they are a notification email that is sent to the school admissions email address to say an EOI has come in or an Enrolment has come in.
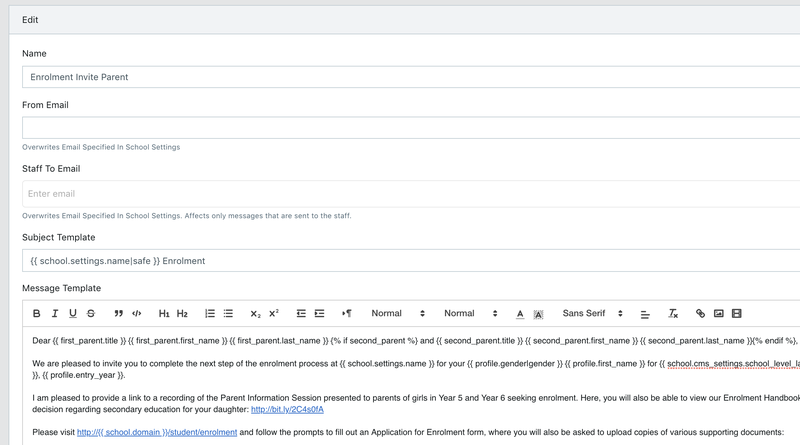
To edit a Template, click on the Edit button on the far right side. For each template you are able to edit the following:
Custom Templates are not attached to any particular form submission or action made by staff/parents. These are templates you set up yourself to use with the ‘Bulk Email’ function in the CRM or in the Automated Emails which are triggers that you set up yourself.
This area of the Email Settings gives you raw HTML access to setup Email Signatures. For example, if you want to include a school crest and style the text of your email signatures in a particular way then you can use the raw HTML to create the signature. Please get in touch with EnrolHQ support if you are not sure how to use this feature, we will help schools create these HTML signatures.

All the built-in templates are sent because parents make form submissions or payments or staff complete actions like ‘Inviting to Enrol’, ‘Make Offer’, ‘Decline’. EnrolHQ also has the ability to send notifications to parents/staff automatically based on actions not being completed being a trigger. This is great for notifying staff if parents have started an enrolment form but hasn’t completed it in a certain time, or if an offer has expired.

To create your own automated email, simply click ‘Create’ (you have to make a Custom Template first with the From Email address, Subject Template and Message Template).

In the ‘Automated Email’ the steps you have to follow are:
Trigger Once - means this email will only ever be sent once. For example if the staff extends the expiry and the parent lets the offer lapse again then the email won’t be sent a subsequent time if ‘Trigger Once’ was ticked. For this case you would leave it unticked.
If you want to send an email based on forms not being completed a week after they start, then you would set the Trigger to be ‘Enrolment Form Started’ and the Cancel Event to be ‘Enrolment Form Submitted’ and the delay to be 168 hours (7 days). This means that if a parent does not submit the enrolment form by 7 days after they started it, the automated email notification will be sent.