Event Form Customisation
Events can be setup by Campus if you have a Multi Campus School.
To Add a Campus - EnrolHQ allows schools with multiple campuses to use the same form with different options as shown in steps 1-6. to look at how a form preview's by campus please use the following:
https://testing.enrolhq.com.au/events/?campus=enrolhq-campus
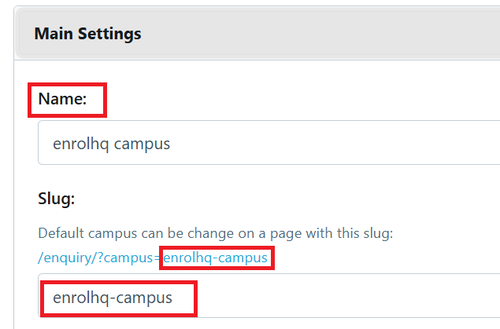
This link is found in Settings> Campuses > Main Settings
https://testing.enrolhq.com.au/events/
To customise Events go to Custom Forms > Select the relevant Green STUB e.g. Enquiry - Event Booking Form
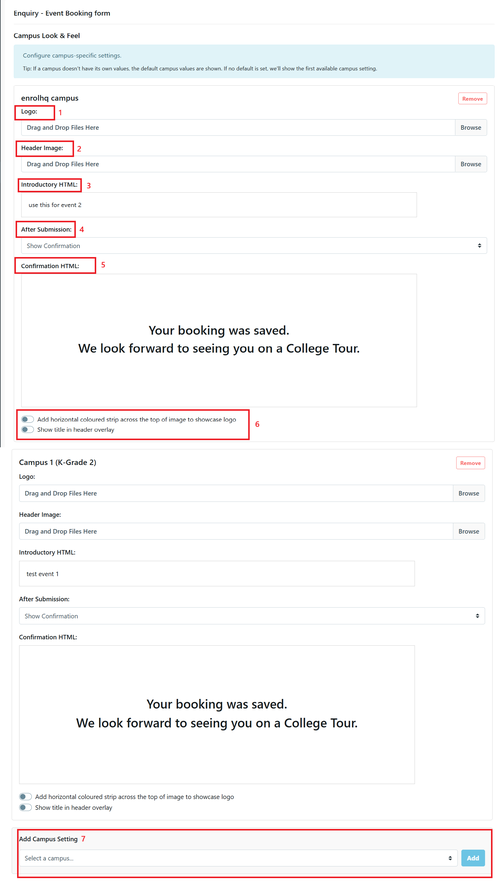
- Logo - this is always the image that have been added in the default Campus. if it needs to be different you can upload a different logo here for just this form.
- Header Image - this is always the image that have been added in the default Campus. if it needs to be different you can upload a different logo here for just this form.
- Introductory HTML - this information is displayed at the top of the form prior to the parent commencing by entering their email address. Users can use HTML code or select WYSIWYG to use the standard formatting options.
- After Submission - there are multiple options for actions after the form has been completed and submitted
- Show Confirmation
- Re-direct to Parent Dashboard
- Re-direct to Enrolment Offer acceptance
- Re-direct to next custom form
- Re-direct to URL
- Confirmation HTML - This option is used when you do not wish to redirect parents to any of the other options b-e.
- Add horizontal coloured strip across the top of image to showcase logo and/or Show title in header overlay - these a different ways to display the form, you may select according to your preferences.
- Add Campus Setting - you can add and remove campuses as required
The example above has 2 different Campuses setup - if you do not want the Campus use the Remove button to delete.
To update for forms you must SAVE.