How to upgrade to UI v2
Look & Feel Overview UI V2
In 2024 we released an updated version of the Enrolment Dashboard that incorporates the use of both mobile devices and computers.
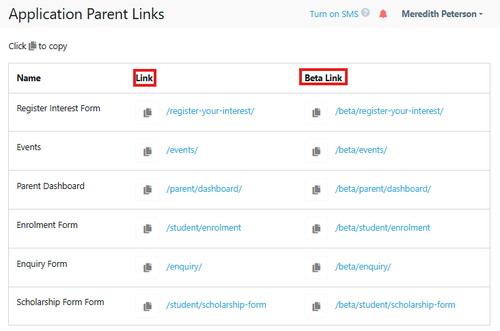
To preview all the current setting and compare them to the new UI version there are shortcuts in the parent links.
If after you have previewed the new version you are happy with the presentation of the new form the you can switch immediately.
Note: that you musty turn on the New UI to be able to access the V2 Look and Feel Settings - you can turn it on and off until you are happy with the look, It is recommended that you do this at a quiet time (early or late in the day).
If your Form preview's are not displaying correctly, you will need to go to each of the Customisation setting to update the details for Events, Enquiries, Applications etc to review the setup.
If your Colours or Font's are not displaying correctly, or if your Standard Images and Logo's need to be updated, you will need to go to Look and Feel Settings
If Individual events are not displaying correctly you may need to review each event header. Events Customisation Setup
How to turn on the new feature and update the Look & Feel
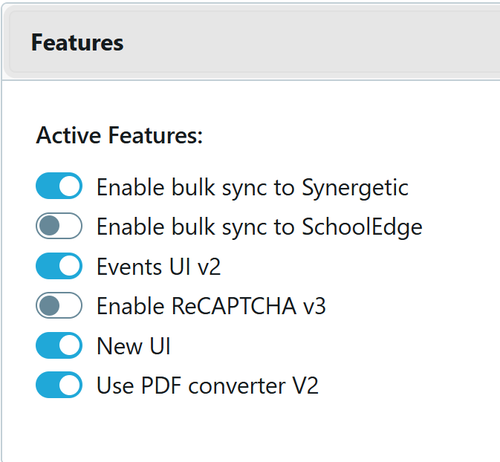
Go to Settings > School Details > Features > use the toggle to turn on the New UI
Note: that you musty turn on the New UI to be able to access the V2 Look and Feel Settings
Individual Header Images for Each Stub Form
If you would like to customise your forms with different images
Go to Custom Forms
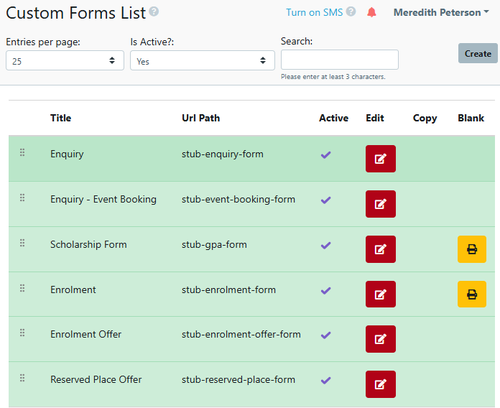
Select the form you wish to modify the image for
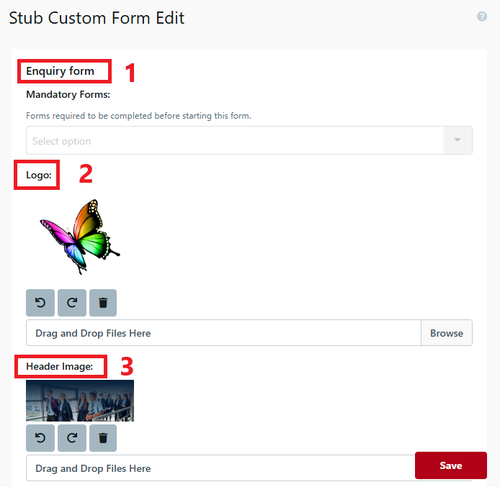
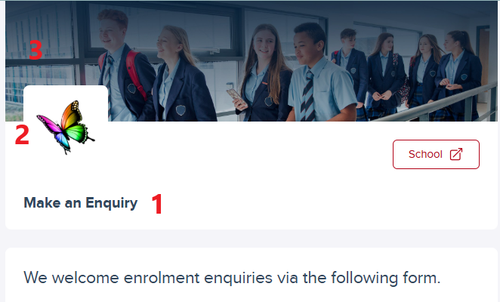
- Enquiry Form
- Logo for the Form
- Image to be displayed at the top of the Selected Form
Individual Header Images for Custom Forms Only Available For V2
If you desire a different header for each form then you need to edit each form to include the alternate image. for full instructions about Custom forms go to Creating Custom Forms

If you do not replace the logo or image then the image that has been setup in Look & Feel will automatically be used.
If you have no image's setup in look & feel them the primary colour banner will be the default header
All the details shown in the image above are copied when the Custom Form is duplicated. this includes
- Introductory HTML Snippet:
- Confirmation Html:
- Logo:
- Header Image:
- PDF Header HTML Snippet:
New UI Version Event Header
There is only one place to set the header image, which is the 'Application Header Background Image' (old version) that is now to be renamed to 'Parent Dashboard Header Background Image' (new version- which is currently not reflected in settings).
However, by putting the header image there, this will apply to the entire parent dashboard - as it will be set everywhere (per current settings) if it is on for one form.
So if you want an image in the Header for the Dashboard and on the forms you need to add in both locations, alternately you can use a different Image