We hope you find these EnrolHQ tips and recommended steps helpful in what to do after receiving new applications.
How to Find Your New Applications in the Staff Dashboard
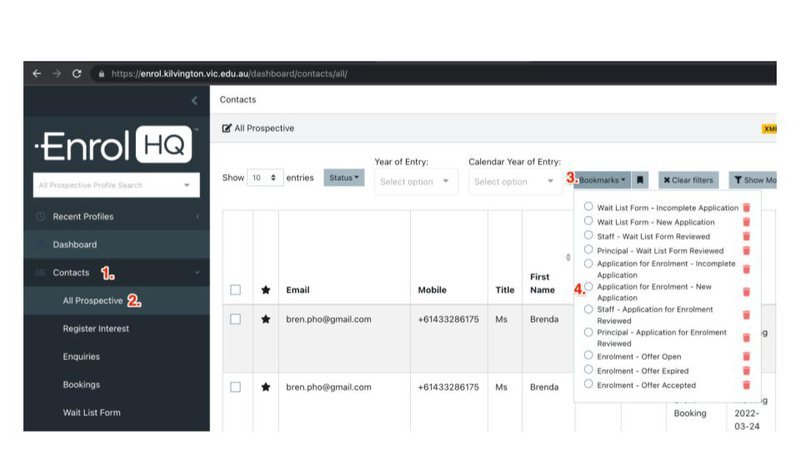
- Click on Contacts - this will expand all the Enrolment Journey Stages
- Click on "All Prospective"
- Click on the "Bookmarks" Button
- Click on "Application for Enrolment - New Applications"
Requesting Parent 2 Signature
Check first whether or not it is a true single parent family by looking at the birth certificate and Court Orders and answers provided for 'Parents Relationship'
If it's not a true single parent family, you can Request Parent 2 Signature or Waive Parent 2 Signature for both the application and offer.

- Request Parent 2 Signature will send the signature link to Parent 2 to sign either the application or offer of a place acceptance.
- Waive Parent 2 Signature will allow the application or offer of a place to proceed without a second signature.
Staff Review and Status Changes
For information about how to use Staff and Leadership Review please view the article Staff Review and Leadership’s Review
Checking the status of these reviews and viewing Lead Score Rank can be checked in Application Staff Review and Application Leadership Review. You will also see the score appear under the green Review tick.
Once the review is complete and the green Review tick has been given, you can change the application to the relevant Enrolment Journey Stage.
Bulk Un-Verification and Requests for Re-Upload
For information about how to use these options in bulk view the article Bulk Actions
Requesting additional copies of documents can happen at various stages along the Enrolment Journey. The easiest way to do this is to use Bulk Actions. Checking the status of these requests can be done in Reports > Documents.
Step by Step Guide
Here's a step by step guide of what to do or what to check after receiving applications:
- Find your new Applications
- Check the application, which may be printed as a PDF file if required
- Check Payment
- Request or Waive Parent 2 Signature, if required
- Verify document uploads
- Request document re-upload where documents are missing or uploaded incorrectly
- Mark as Staff Review - green tick (okay), yellow exclamation (more information required) or red cross (no) and move to another Enrolment Journey Stage e.g. Wait List
Checking the Application
Go to the Student Profile Detail View. Here you will navigate through all the different tabs.
Of most importance is:
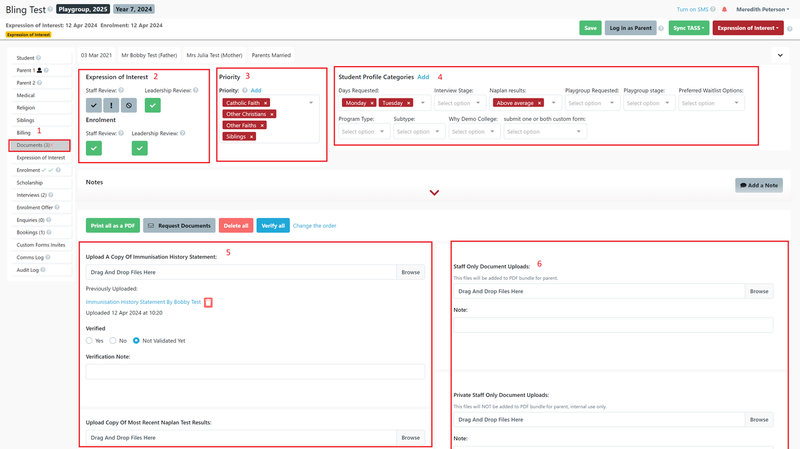
- Documents -all documents uploaded with an application or custom form by the parent or added by staff
- Priority - Sibling, Staff, Alumni, etc
- Student Profile Categories - selected by the parent or added by staff reviewing the application
- Documents (uploaded by parents/carers) ready to be verified
- Documents (uploaded by staff or 3rd party Custom Forms that parents cannot view)
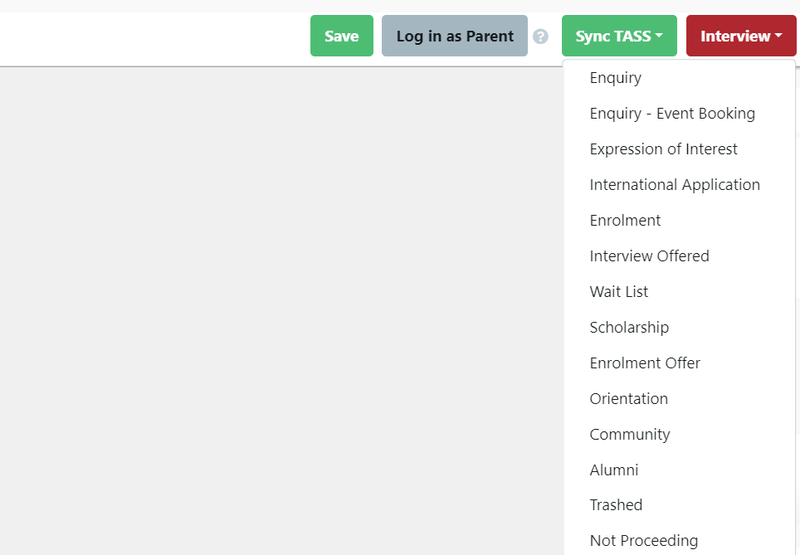
Enrolment Tab - the name of this field can be customised in Settings > Enrolment Journey Stages

When you go to the Enrolment Tab (1) you will see:
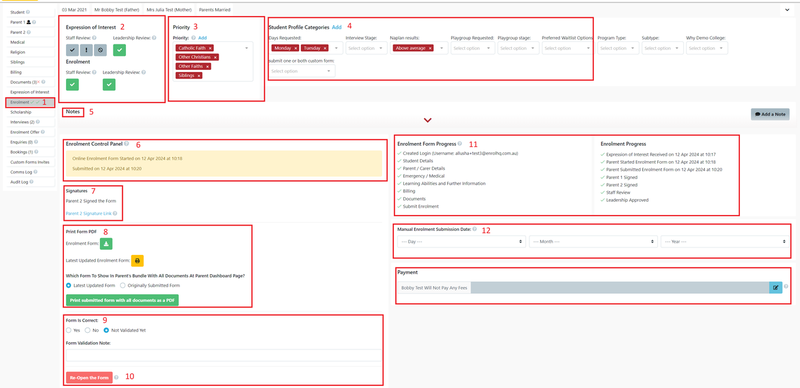
2. Review buttons
3. Priority
4. Student Profile Categories
5. Notes
6. Enrolment Control Panel
7. Signatures
8. Link to the completed form in PDF format
9. Form verification
10. The ability to re-open the form if details have ben completed incorrectly or amendments have been made and the form needs to be re-submitted
11. Progress Stages follows
12. Manual submission date
13. Payment details
Reviewing an Application
PDF Bundle - You can choose to do both the document review and the Application review by downloading the Print Submitted form with all documents as a PDF (ref 8 in the diagram above). It should be noted that our document security settings allow the downloaded document to be available for only 30 minutes before the link expires. See the section Verifying Documents.
Documents Tab - You can go to the Documents tab and view each document individually and compare the information provided with the Application data in Student and Parent 1 and Parent 2 view. If the document is acceptable, it is marked Verified 'Yes', otherwise a document can be left unverified or marked 'No'. Only documents that are Verified 'Yes' will sync with your SIS.
If all the documentation is correct, and you have verified all the relevant information, the Staff Review traffic lights are used to show that the Application has been checked and all information is correct (green tick).
If there is an issue with any of the information provided in the Application, use the Staff Review Yellow ! to indicate that action has been requested either of staff or parents. For example, an unverified document that requires re-uploading. Or the Staff Review Red X if the application cannot proceed; for example, where a visa cannot be validated.
Use of the Staff Review buttons ensures that the Ranking of Applications is displayed in the Staff Review Section of the Dashboard (if ranking and lead scores have been added to your Application set up).
Checking Payments
Payments are recorded against the Application for all the various Enrolment Journey Stages.
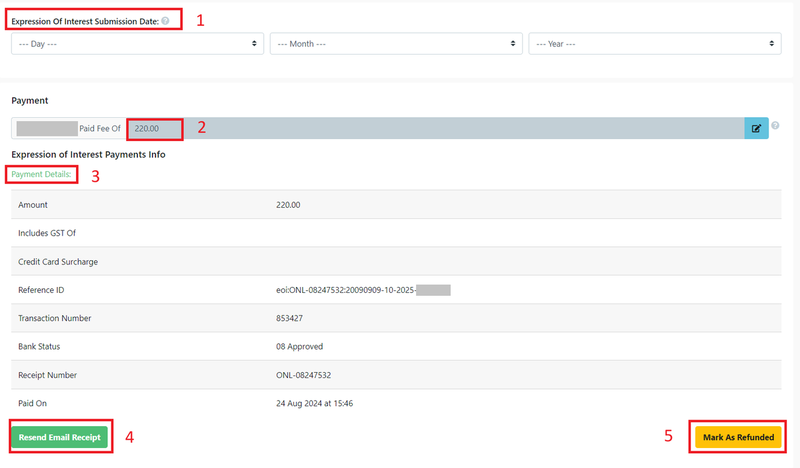
- Expression of Interest Submission / Application Submission used in the Enrolment Journey.
- Payment - this is the payment amount required excluding any surcharges set up in your Payment Settings.
- Payment Details - this shows amount charged, and bank details including date and time of payment.
- Resend Email Receipt - if Finance or parents require another copy
- Mark as Refunded - this does not refund the money but is a transactional record to show within EnrolHQ - this actual refund must be completed by Finance.
Checking the Comms Log
Emails sent through EnrolHQ, manually or automated, are registered in the Comms Log. You can use the Comms Log to add internal notes, records of telephone calls, adhoc tours and meetings, and to assign a Staff Task.
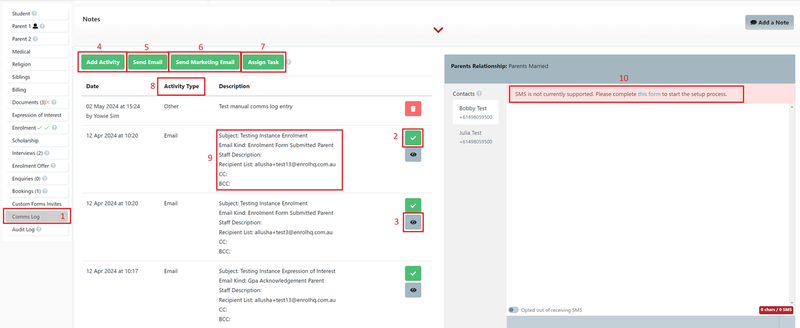
- Comms Log Tab.
- Acknowledgement that the email has been sent (hover over this and it will show if the recipient has viewed the email).
- Copy of the email that was sent to the applicant.
- The ability to add an activity to the applicant (this could be a copy of an email received from the applicant).
- How to send Custom emails by selection.
- How to send marketing emails by selection.
- Assign Task ability to add a task to the applicant and allocate the reminder to a staff member.
- This shows what type of action.
- Summary of the email sent showing Subject, type, Staff Description, Recipient, CC and BCC.
- If SMS is active for the client then the details of messages and responses are listed here.
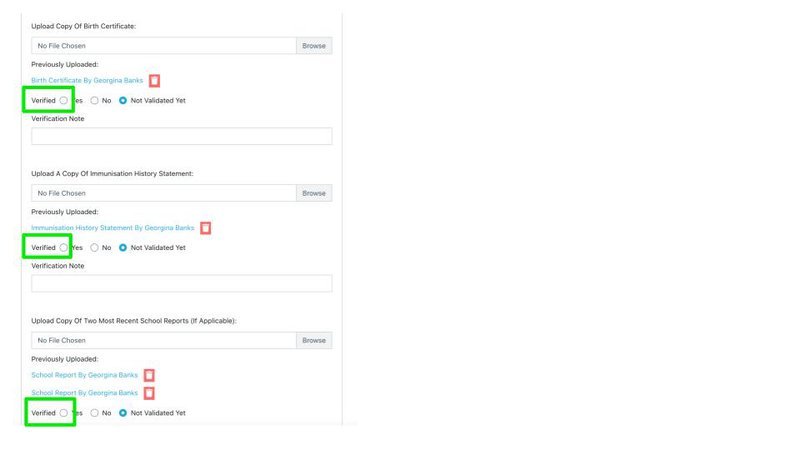
Verifying Documents
Per the above, you can preview the uploaded documents by either via PDF Bundle or via each individual Document on the "Documents" tab.
When Documents are uploaded by a parent they are in a status of 'Not Validated Yet'.
Once you have checked the document, you can either verify 'Yes' or 'No'. Don't forget to press Save at the top right.
If you select 'No' the parents will be required to re-upload the incorrect documents.
Note: only verified documents will be transferred to the School Management System (Edumate, TASS, Synergetic, etc)

- Print all as a PDF
- Request missing Documents (marked as Verified 'No')
- Verify all (by using the PDF in option 1)
- Change Sequence - documents can be re-ordered to ensure the most common ones are at the top of the list for your convenience.
Don't forget to click Save at the top right after verifying documents.

Request Document Re-Upload
Once all the documents have been viewed and marked as either 'Yes' or 'No', you can use the link to request missing or out-of-date documents. The email template is found in Email Settings > Templates > Enrolment > Enrolment Request Documents Parent. The email will list any documents that are in the status Verified 'No'.
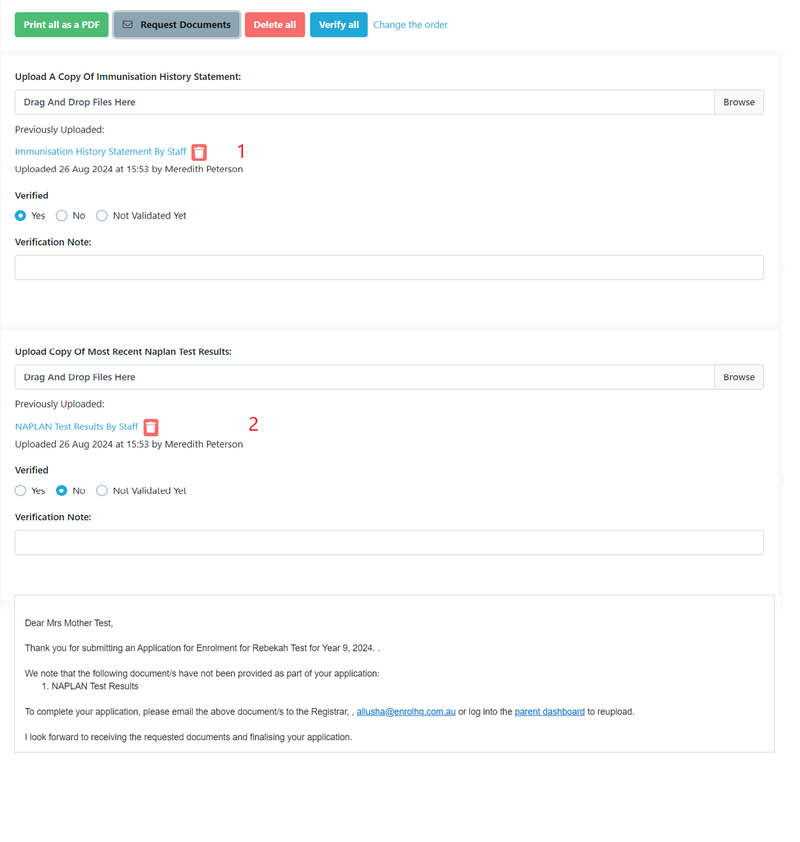
- Document Verified - Yes
- Document Verified - No
A sample of the automatic template showing the document that needs to be re-uploaded is also provided here.