Lead Forms
Updated: 3 weeks, 2 days ago
These forms are created in EnrolHQ and can be embedded in a website to gather partial leads. They allow schools to capture a lead without asking for lots of information as many parents may find it too onerous to complete an enquiry form for simple things such as downloading a prospectus or subscribing for more information. The link to the lead for can also be provided to staff member, receptionists, for example, to complete instead of taking a phone message, putting a potential parent to voicemail or sending an email to the Enrolments Department. This ensures all phone queries are captured in EnrolHQ for ease of followup.
Some schools will find lead forms handy as a marketing tool to capture a lead and start sending drip-marketing emails to entice a parent to take a tour or submit an application.
The lead forms require the bare minimum of information. They can be set up to just collect an email address.
Leads that are collected are stored in a separate Leads Report as they do not yet have enough information to become profiles in EnrolHQ.
Mandatory profile fields are the students details, P1 mobile phone, P1 email, P1 name, grade and year of entry.
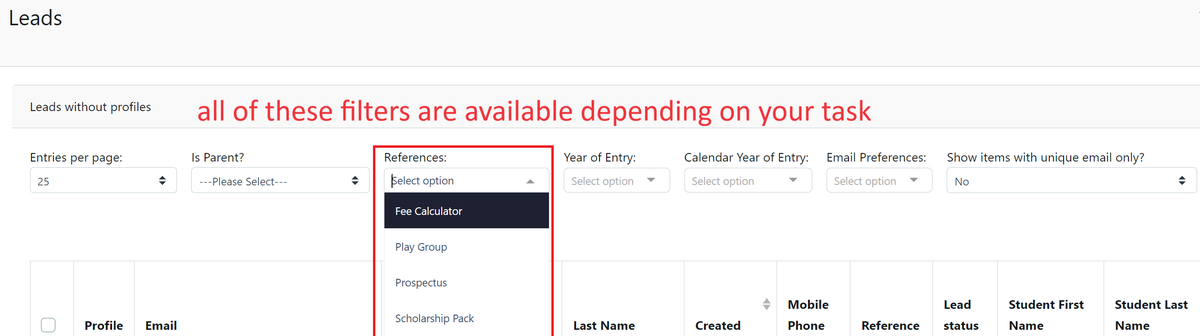
You can find the Leads on the main menu.

How to use the Leads
There are various filters that can be helpful in order to sort the leads. The report can filter between different references that you have created such as Prospectus or Scholarship Pack. It can also remove multiple leads to present a clean list without any duplicates.
An important filter is the “is parent” Yes/No filter, which shows if the lead is a current parent or not (has a profile created). This is important if schools do not want to send out emails if the lead is already inside the main profile section of EnrolHQ.
Schools can use leads to send marketing emails based on the information parents asked for. It may be to invite parents to an Open Day or set up automatic emails to go out 30, 60 or 90 days after last contact to keep the leads warm and your school at the top-of-mind.
How to create a lead form
1 - Settings > School Details > Lead Settings
This is where you make up what forms you want to use.
Type the name of the form and select Add

You can add the a lead form confirmation URL when the form has been completed if required

2 - Embed the form on the website
This prompts the parent to fill in their email address to receive the information they’re looking for and automatically asks for permission to send them emails by accepting the mandatory privacy policy.

Go into Settings > School details and type in the domain name under Allow API requests from domains
This flags that this form is linked to your website and restricts people from putting it on any website.

3 - Create an automated email linked to the different lead references.
The various references are linked to different downloads on the schools website and can be set up as automatic emails that send out the information the parent requests. For example, if a parent wants to see a prospectus he can fill in his email address and receive an automated email with this information seconds after. In the meantime, a lead with his or her contact details and the information he received is made in the leads report.
Go to Email Settings > Automated emails and create the setup by selecting the downloads and events that trigger the email to be sent out.


4 - Set up your own input style
Change the background, different questions/information that has to be answered in the form or redirect the parent to a website with more information about the subject. Note: This requires coding knowledge. Maybe get your IT or web designer involved.

How to move leads into profiles
Click on the profile picture and fill in the missing information.
